pfSense
It is more crucial than ever to secure your home network in the current digital era. Using a dedicated firewall is one of the best ways to achieve this. I decided to use pfSense, an open-source, feature-rich firewall solution, for this configuration. I choose to run pfSense on a tiny PC to make it even more portable and energy-efficient. I'll show you how to install pfSense on a tiny desktop at home in this post, making sure your network remains safe.
0xJeff
3/13/20254 min read
Here is what you will need before beginning the setup:
compact Desktop: Any compact PC or small form-factor device can be used for this project, but I used an Intel NUC (Next Unit of Computing).
pfSense Program: You can get pfSense from the official website; it is open-source and free.
Two interfaces for networks: For LAN and WAN connectivity, a tiny desktop should ideally have two network interfaces (NICs).
Although you can later configure pfSense remotely, you will require a keyboard, mouse, and monitor for the initial setup.
pfSense will be installed on the tiny desktop using a USB flash drive.
A modem or router: For WAN port internet connection.
First, get the pfSense installation ready.
Get pfSense https://www.pfsense.org/ Download the relevant software version from the pfSense website. For the majority of contemporary devices, pick the AMD64 architecture and use the USB Memstick Installer as the installation image.
Make a Bootable USB Drive: Use a program like as Etcher (cross-platform) or Rufus (Windows) to make a bootable USB drive that contains the pfSense installation image.
Put the Mini Desktop's USB drive in: Insert the bootable USB drive into a tiny desktop's USB port.
Step 2: Use the USB drive to boot up the mini desktop and access the BIOS and UEFI settings. As soon as your tiny desktop turns on, hit the necessary key (often F2, Del, or Esc) to access the BIOS or UEFI settings.
Configure the Boot Priority: Make the USB drive the main boot device in the BIOS. Reboot after saving the modifications.
Install pfSense: The installer for pfSense will now start to load. To install pfSense on your tiny desktop's internal storage, adhere to the on-screen directions. Unless you have particular preferences for disk configuration or partitioning, you can select the default settings.
Finish the Installation: pfSense will prompt you to disconnect the USB disk and restart after the installation is finished. The small desktop will then boot into pfSense when you do this.
Step 3: Initial Configuration of pfSense
Link the LAN and WAN together:
WAN Port: Attach your small desktop's WAN port to your internet-accessing modem or router.
LAN Port: Attach your tiny desktop's LAN port to a switch or a device directly connected to your internal network.
Open the pfSense Web Interface and log in:
An IP address for the LAN interface will appear on the console screen once pfSense has booted up. It is usually 192.168.1.1.
Go to http://192.168.1.1 in a browser.
Admin is the default username, while pfsense is the default password.
Launch the Setup Wizard.
You will be guided through the first setup by the pfSense web interface. To configure the system, follow the wizard:
Configure the hostname: Use a name like "HomeFirewall" to identify your firewall.
Set the Time Zone: For accurate logging, make sure the time zone is set correctly.
Configure the local area network and WAN: The modem or router should be linked to the WAN interface. Your internal network will be linked to the LAN interface.
Set up DHCP and DNS: You can set up your own DNS servers or utilize the ones that are provided by default. If you want pfSense to automatically assign IP addresses to devices in your home network, turn on DHCP on the LAN interface.
Step 4: Examine the Network and Verify Connectivity To make sure the firewall can connect to the internet via the WAN interface, try pinging a website using the pfSense web interface, such as google.com.
Set up NAT (Network Address Translation): pfSense should do this for you by default, but it's a good idea to make sure. NAT enables your local network devices to connect to the internet using your ISP's single public IP address.
Step 5: Use Extra Configurations to Strengthen Security
Rules for Firewalls: As a decent security measure, pfSense by default filters all incoming traffic on the WAN interface. If you wish to create a web server or gaming server, for example, you may change these rules in the firewall settings to permit particular incoming traffic.
Enable VPN (Optional): pfSense supports VPN programs like OpenVPN if you require remote access to your home network. This can be set up to safely join from a location outside of your home network.
Configure Logging and Alerts: To keep an eye on network activity, pfSense provides a comprehensive logging system. You can stay informed by setting up alerts for questionable failures or activity.
Step 6: Continued Upkeep and Observation
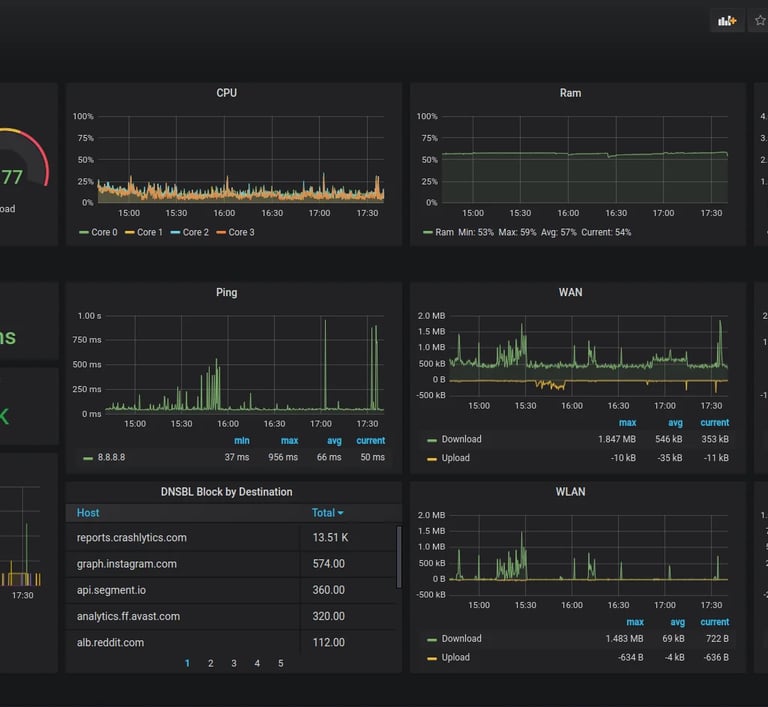
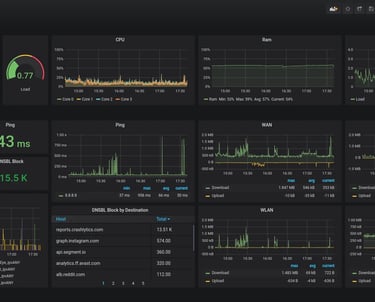
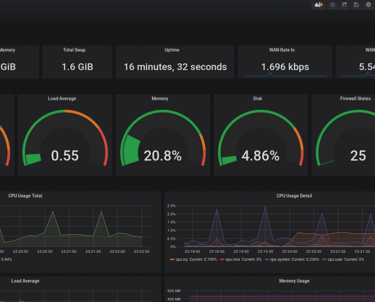
Examine the dashboard: A real-time summary of network health, traffic data, and system performance is given by the pfSense dashboard. Be sure to keep a frequent eye on this.
Software Updates: Make sure you are running the most recent security patches and features by routinely checking for pfSense updates.
Backups: Making regular backups of your pfSense settings is a smart idea. This can be accomplished through the pfSense web interface's Backup/Restore menu.